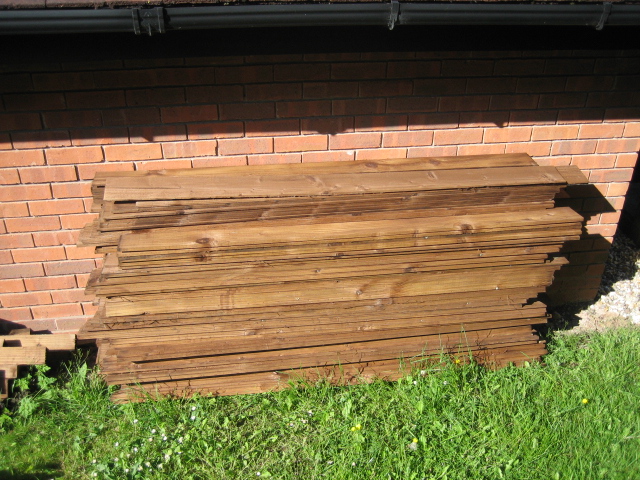
First order of business on this wind filled day is to get the floor down. First off I laid down the water proof roofing felt and then cut the old fence pickets to suit. The floor bearers are 300mm spacing so the floor doesn’t flex at all. Is this recycling or what, the old fence is being used as a floor and I have loads left to build all sorts of stuff. Plus the old shed which is Tongue and Groove will be used to build storage boxes etc. so virtually nothing to the dump.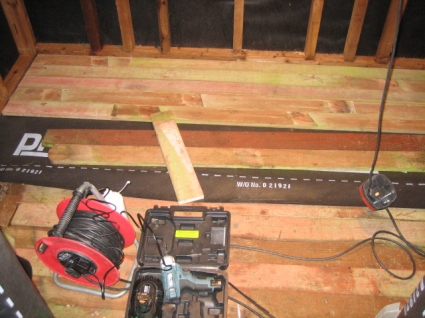
Fixing from the far wall towards the door. I used screws rather than nails as I might need to take a board up if it breaks . I will use the same boards to build shelves.
All Done
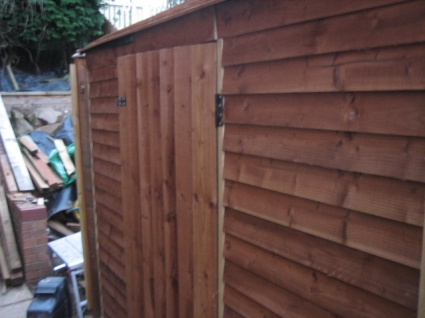
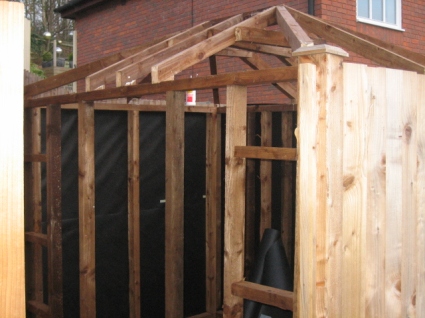
The front of the shed needed cladding next and the door got finished as well.
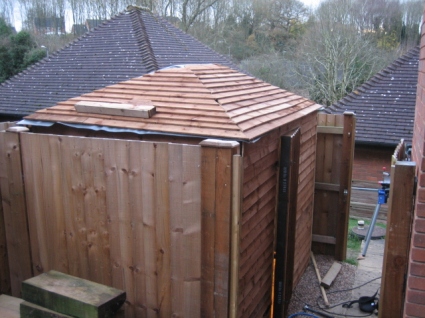
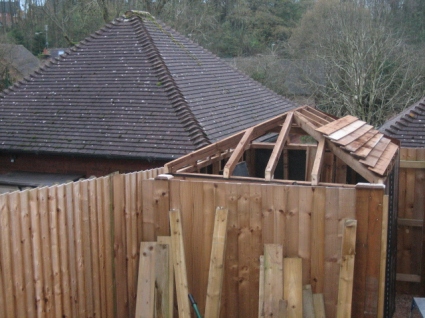
The roof is almost done but needs each hip (corner) and the ridge doing.
To get the roof done I needed to get a platform so with all this wood lying around I decided to build one.
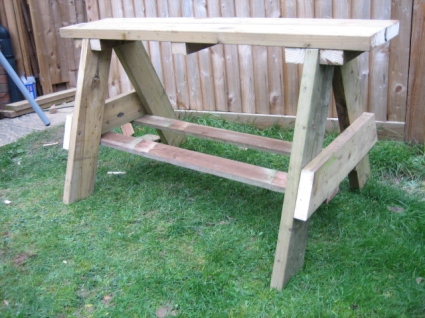
Looks like a picnic table where I ran out of wood. Just need to finish the roof and put the gutter on and fit the electrics and exterior light.
So having built a base and four walls I now need a roof and a door.
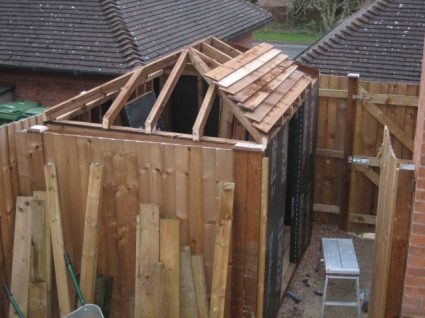
The roof I wanted is hipped (4 sides all slope). Now you can’t build one in situ as you can’t make the ridge beam float in mid air so you build it on the ground and then place it on the shed.
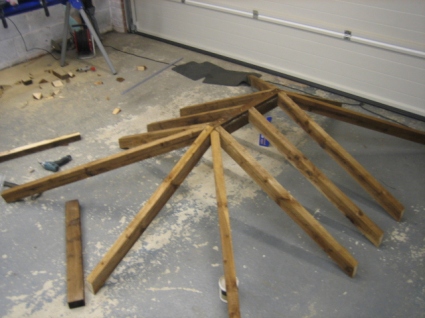
I have attached all the rafters but left the hip rafters to fit when in place to reduce the weight. If you ever wondered how you can use all that trigonometry you learnt at school (Triangles are everywhere on this roof) then this is it (Thanks to blocklayer.comfor making this easier).
Once built I got it on top of the walls.
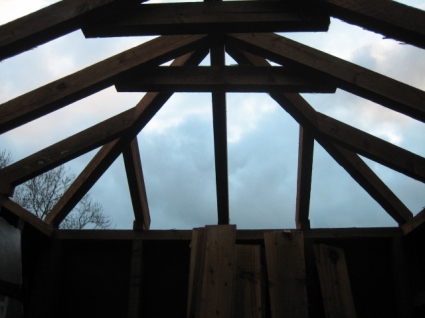
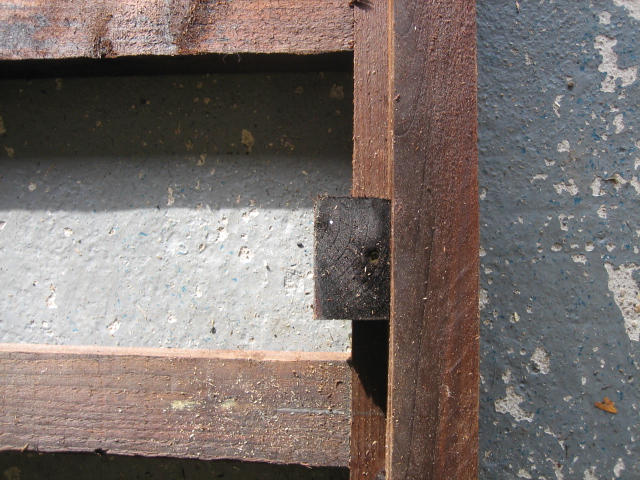
I added the hips in and used the wedge, screw and glue method to attach the roof to the walls (as opposed to bird mouth cuts). I then added some creeper rafters and I have a roof structure.
This shows the roof with a few planks on it to get an idea of the finished article. I will first paper the roof to stop any water leakage and then cover over. Also the front walls can be seen with there roof paper on them and the door can be seen inside with its paper on as well. Basically the whole structure will be lined so no water gets in.
As for the roof material I wanted to keep it light in weight and will monitor the feather edge over time to see how it puts up with the sunshine as it is south facing.
I am trying to mimic the way the garage roof looks in orientation and design. The tiles are available but I calculated the weight of them and thought better of it.
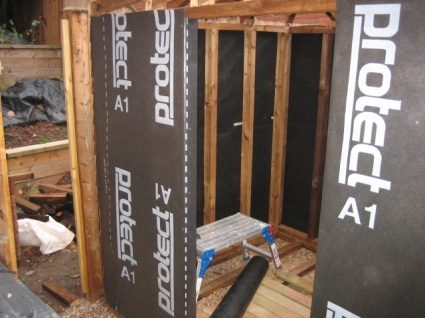
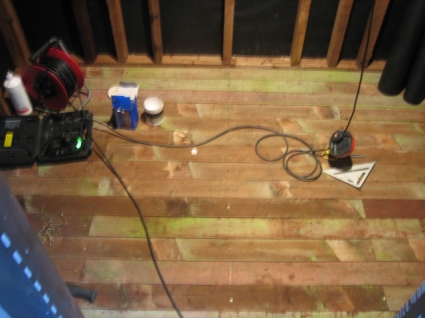
Here you can see more of the water protection I am using. This will also go onto the floor before I plank it over.
Having looked at numerous shed web sites and been underwhelmed by the matchstick framing and OSb nature of the expensive rubbish I decided to build a shed.
But you already have a shed I hear you say, well true I do but it is a bit naff and is in the back garden in a spot I have designated for a garden office so go it must (although I am dismantling it and reusing pretty much all of it). The new shed will be sited to the side of the house in a purpose made fenced in enclosure that the three of you who read my Fencing the Garden post may well remember
The area where the bins and wheel barrow are. The base will be made up of plastic grids on top of a weed fabric covered in pea gravel.
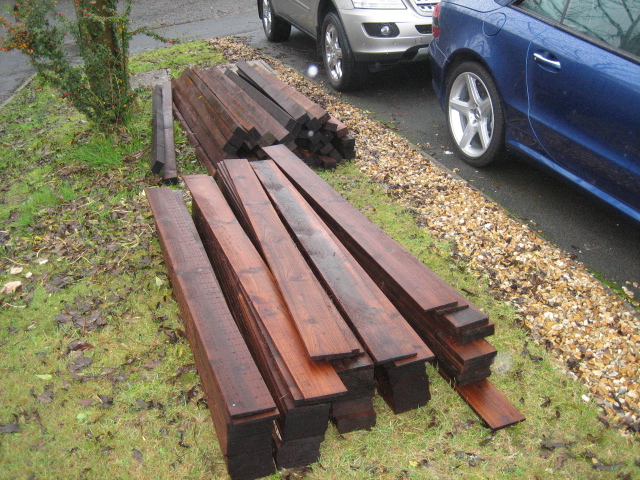
Start off by ordering a pile of pressure treated timber. I decided on a 75mm x 50mm frame and featheredge to cover it. The roof will be hipped and be similar to the garage roof in the same orientation – although it will be covered in wood not tiles.


Using the garage as its flat I laid out the base frame as 2400mm x 1800mm. It helps to have a mitre saw and stand to speeds the job up a bit.The base I laid so the 75mm was the width to give maximum surface area to the gravel and also the walls fit exactly as their base is 75mm wide.


Having built the base I then used it as a jig for the walls. We have 1800mm high walls (base depth) and 2400mm front and rear with 1800mm wide sides (although the frame is 1650mm wide as they fit between the front and back on a 1800mm base). The pictures above show how I used various wood blocks to retain the wall pieces to the correct dimensions.


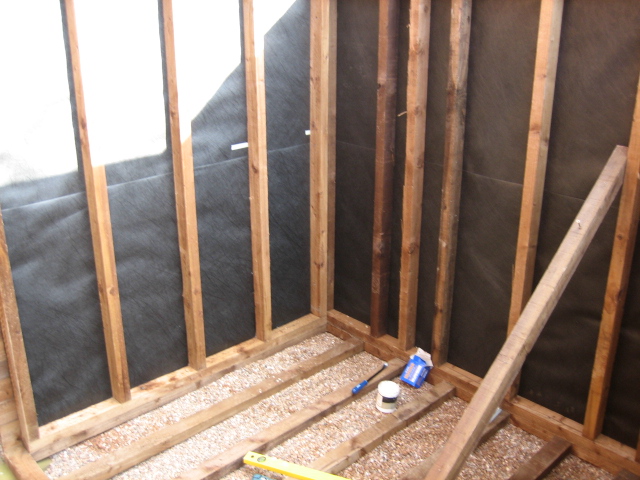
Having dragged the frames to the assembly site which was similar to the Egyptians building the pyramids – except in every single way. I then set about cladding the frame. The underlay is used on roofs so will protect the shed from water getting through and keep it damp free. Also there are no windows in the shed as I want to use all wall space and also for security which will be built into the structure and inside the shed as well which I won’t go into.
I used my trusty spacer from the fencing job (the block of wood that isnt red/brown) to give 100mm wide boards. I also used m air nailer which I would say is essential to do this in any sensible time scale with accuracy. For every three boards fixed I measured from the top and made any adjustments necessary to keep it level as wood is a natural material and will not be perfectly cut.

Once the three walls were complete I then screwed it all together. The use of the base as a jig really pays off here as everything fits to the mm (see picture above, you can also see the overlap of the feather edge and the shorter side frame).
I then placed the front wall and secured it with 100mm screws. This has a gap for a door and is reinforced as part of the security measures.


Next step is to true the whole lot up and make a start on the roof. The floor will be covered in the same roof paper as the walls and I will use the fence pickets removed when I did the fence last year. So all in all the fence is being reused as well as the old shed which itself has parts of the previous shed making up its floor.
More progress. Finished the internal fence which will divide the storage area from a small decked area below the garden terracing (where the dirt is to the left)

To overcome the width of the gate issue caused by a buried sewer pipe I doubled up the right hand post with Glue and bolt screws

Looks like a single piece of wood but the right hand block is fitted above ground. With that in place I have a gap to the wall for a 900mm gate a 100mm post and 10mm air gap to wall and 5mm each side of the gate.
Next step were some gates. Had trouble getting hold of gates and I wanted to match the existing gate in look. The ones I saw were a bit rubbish and badly built so I built my own.
Using 20mm x 100mm x 1800mm planks I created these

The feather edge matches the fence and the design matches the existing gate.
Used two vertical planks at 1800mm and braced with three 900mm planks (giving me the width I needed) then cross braced between the horizontal braces. All screwed frame with finish nails for the feather edge.


Rather than try measuring I clamped the brace and used a pencil, this is much more accurate.
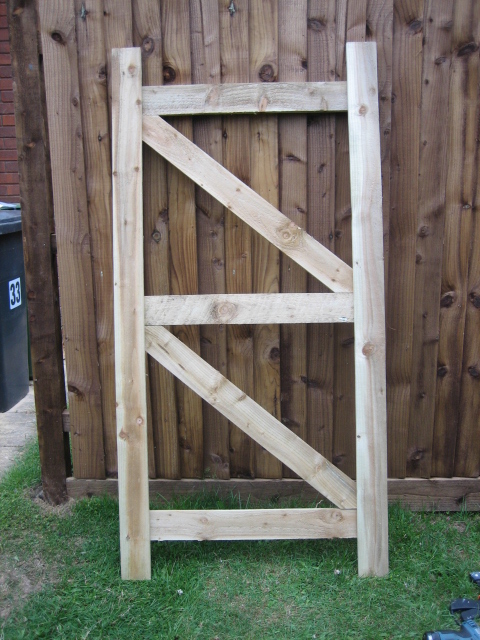
This is fairly stiff just on its own but when you add the feather edge it is fairly solid considering only 20mm timber. I used 20mm as the existing gate is 20mm and that has been up for 20 years.

Anyway once done you get a gate. I made sure the diagonals were at the top on the hinge side as when I fit the latch I don’t want it in the way – the above has a right hinge side.
I decided on some reclaimed oak gate latches as the galvanised stuff is just crap

Got three of them for all the gates.
Now just need to attach hinge posts to the wall and mount the gates.
Did some more work on the other side of the garden and at the side garden. The fence by the shed was really rotten and the pickets fell apart near the top
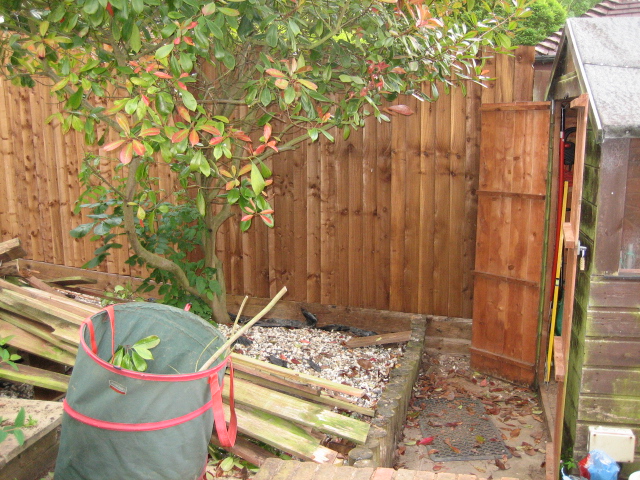 The shed will go when I extend the decks and a new fence will be constructed around that area but for now I used 300mm of gravel board and stood the fence on it.
The other side of the garden went well but had to chop a large branch from the tree in the corner as it projected through where the fence needed to be

Also I covered over the fence above the wall and levelled it all off

It looks fairly organic as the boards top and bottom line up. Used a string line to keep it all level as there are no natural levels to work with.
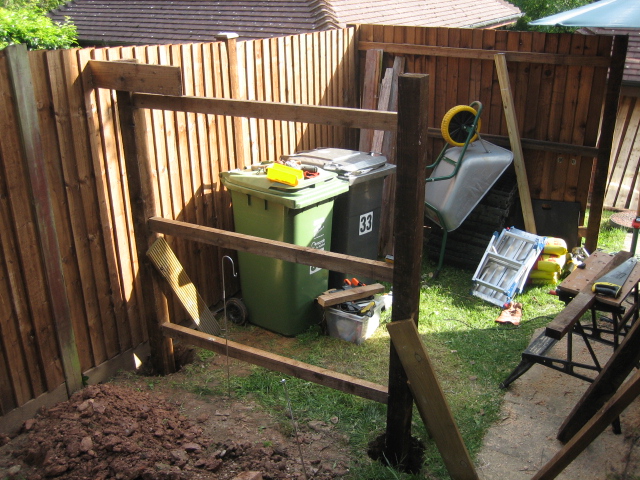
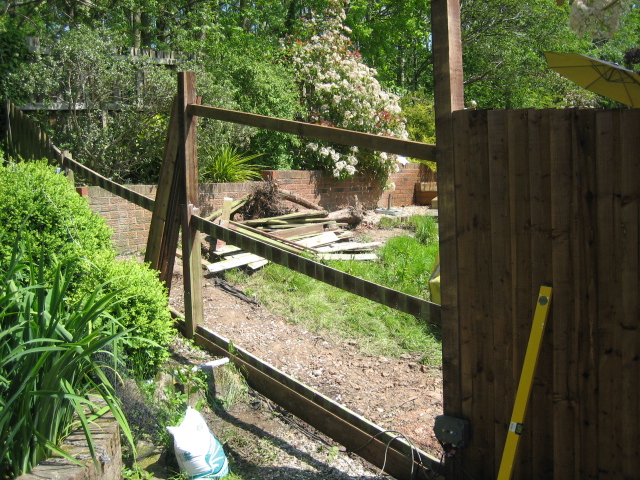
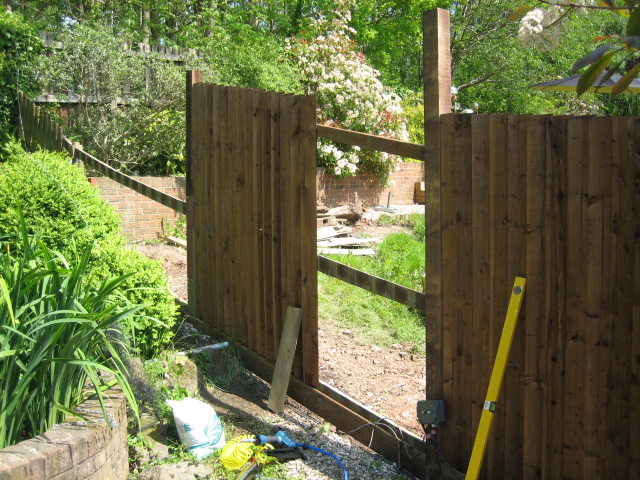
For the side garden I have erected a surrounding fence and am now doing the inner dividing fence to cut off what will become the new garden storage area (which is why my shed is going).
So from the window it will be a small decked area with two terraces but behind the fence are my custom built storage sheds. the more observant amongst you may note a gap in the fence at the front. This will be filled when I get my table saw out and rip some featheredge.

The fence is then built free standing from the surround I did want the right post to go further over but there is a sewage pipe just to the side so I will build above ground an extension for the gate jamb. Also as I am building the gates I can make them any size I like.  The pipe is top right behind the clay bump. It was surrounded by pea gravel so I knew it was near when I got gravel. The only tool to use to dig a round hole is a curved spade, this is called a Newcastle Draining tool and is fantastic at digging through clay soil
  Several hours and 4 bags of postcrete later you end up with a fence frame. Note the supports to get the posts to stay upright and also that it was put in as a complete frame.
  Now that is done the easy bit is the featheredge boards. I will add a gravel board at the bottom and lay the boards onto that which gives me my level. They are called gravel boards but they are made of wood which is treated and saves the bottom of the fence from getting wet from the ground which will make it last longer. If the board rots then it can be replaced quite easily, also for uneven ground it is good for retaining soil etc. and we have a lot o uneven ground.
Continued with the work during the week dodging the rain and wind.
These boards really do go up quickly

I am using a combination of wood joints, biscuits, Glue and Screw to extend the existing posts. The glue is for external work and with 8 screws and a couple of biscuits joints it is as solid a single wood post.
Just the top two sections left to board now but it is raining again so no go for today.
Well after my neighbour decided to chop down the hedge between our gardens I had to bring forward my plans to sort out the fence to give us back our privacy. From this 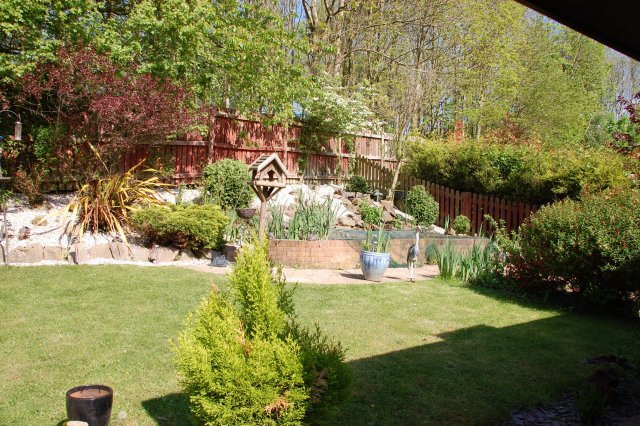 to this
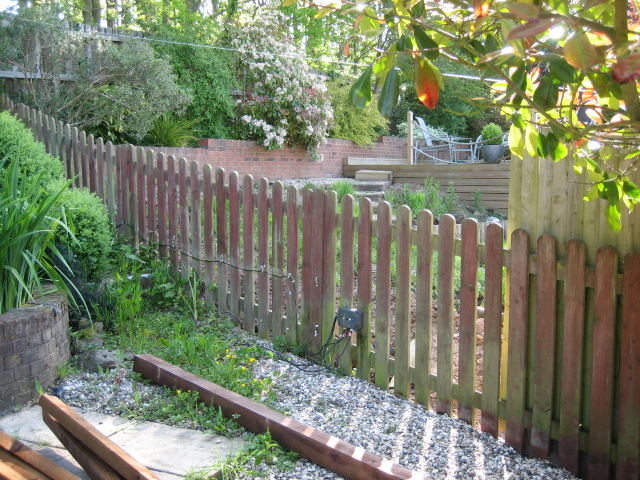 First thing was to replace the post in the centre of the above image as it had broken at the base and was only placed in the ground and not concreted. To do this I got a 3m high post to allow for the ground height difference and dug out the old post and created a new hole. Then I placed the post into the hole and marked where the two rail would go and marked for the third rail based on the difference between the other two rails. I then cut three through mortice holes in the wood and set the post using postcrete which worked really quickly. This is the result having fitted the top rail
  The post will be cut down once the fence has been filled in using featheredge boards. These are thicker on one side and overlay each other. I have gone for 125mm wide with 25mm overlap which is 10 per metre. The boards are 1800mm high and so I fitted two gravel boards giving a 300mm rise at the bottom of the fence. It is also useful as a guide for fitting the boards and keeps the boards from contacting the ground. This is the result
  Now I need to repeat the process for the remaining sections and also replace the pickets to the right with feather edge to match the new fencing. I found a finish nail air gun very useful when fixing the boards
 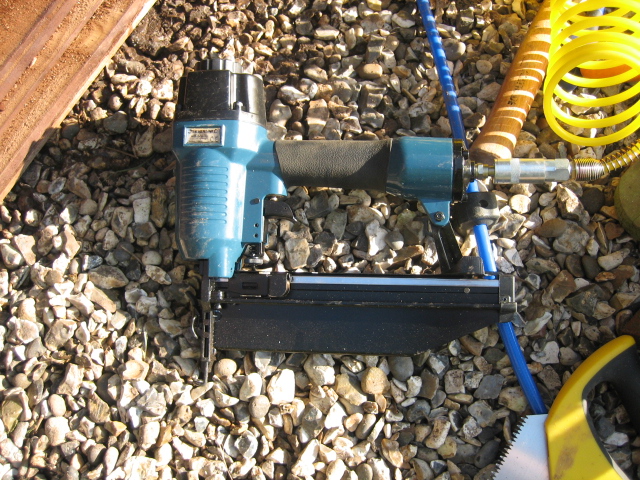 I have also bought a lot of material as I intend to do the other side of the garden as well as fence in the side garden.
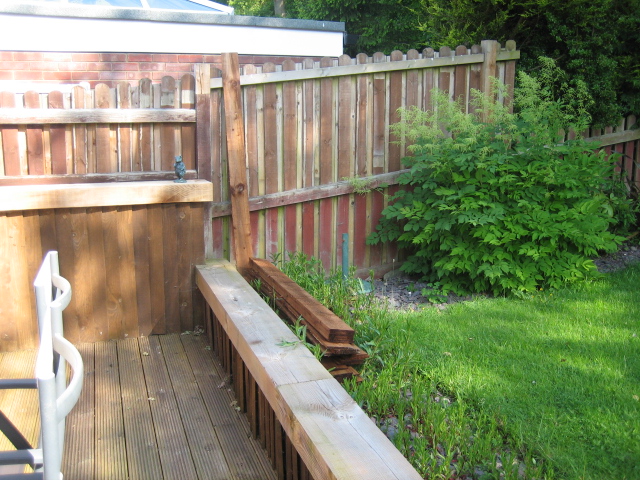


The side garden has also received some treatment to take the slope out by terracing

The fence will also be feather edge and all stained in Dark Oak.
Well having had the deck down for several months it is time to get the protection on it for the winter.

Decided on deck oil as it is absorbed into the wood rather than sitting on it like stain does.
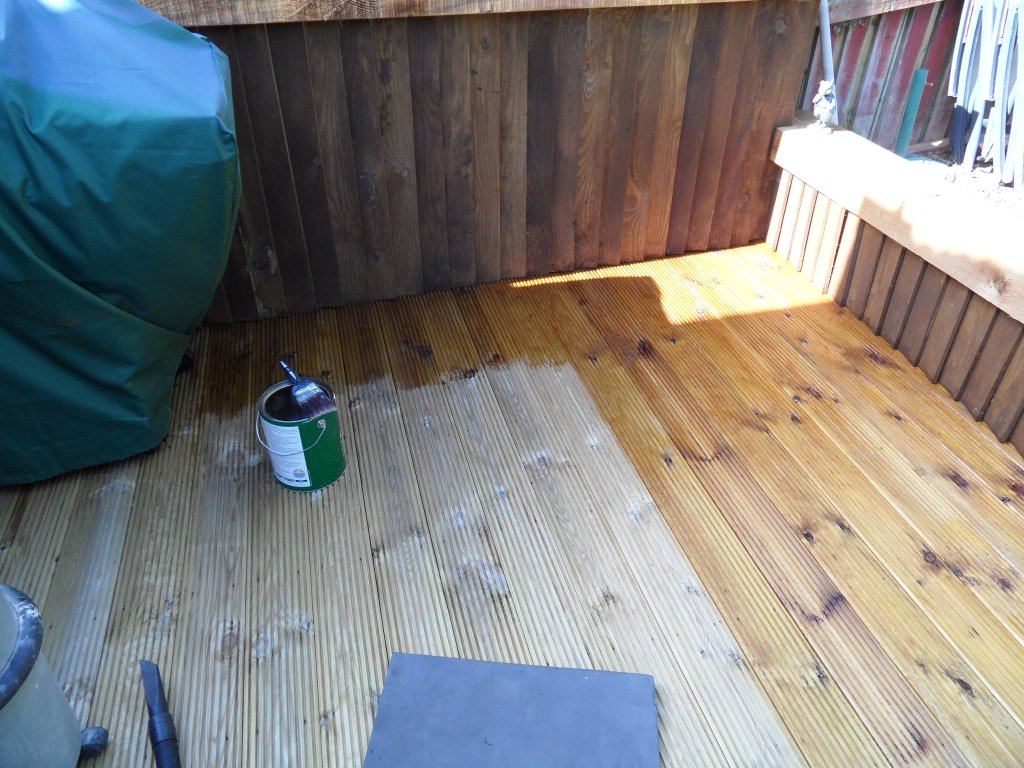
As you can see it makes quite a difference in colour and is easy to apply.

In future I wil oil the deck boards before I lay them as you need to stay off the deck for a while whilst it dries. (try telling the cat that).

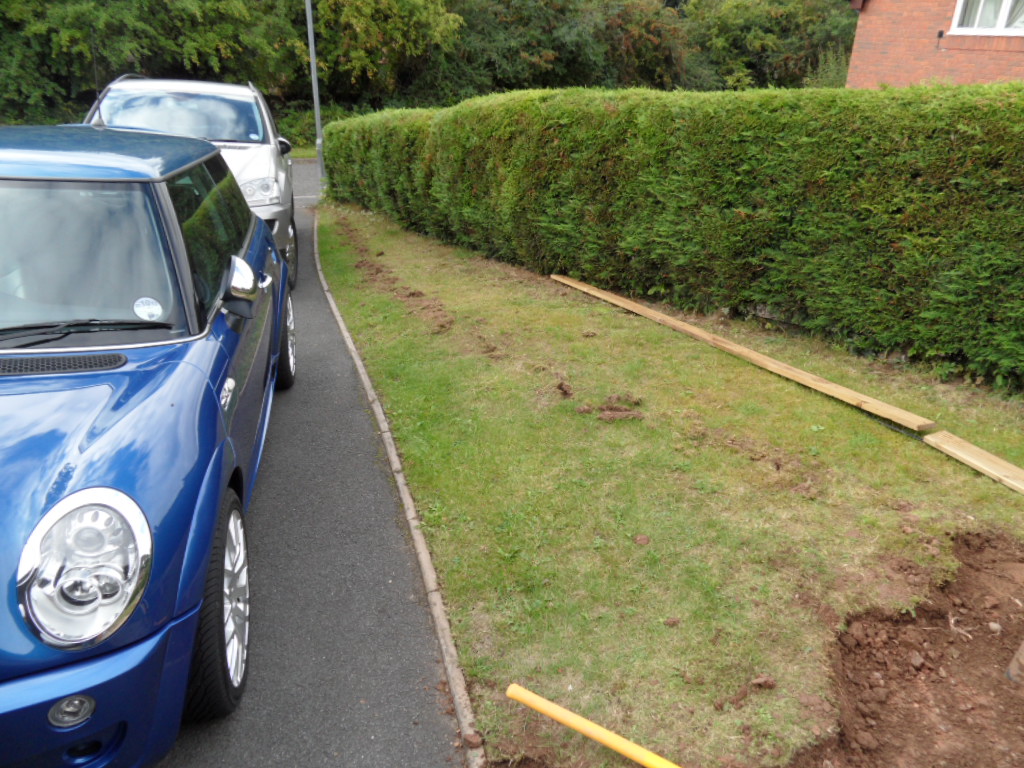
Having completed the dig out I laid the ground cloth and placed the grids back down. I used 20 tent pegs to secure the grids and to allow me to bend them to follow the drive edging. I left the right hand side at the hedge without grids as that area has a lot of hedge roots and to dig it out could compromise the hedge so there is a slight rise there.

This is the spoil heap dumped into the side garden slope. I will use this as fill for my terraced slope (next task). Must be about 20 barrow loads.
Two bags of gravel delivered so set about spreading it out.
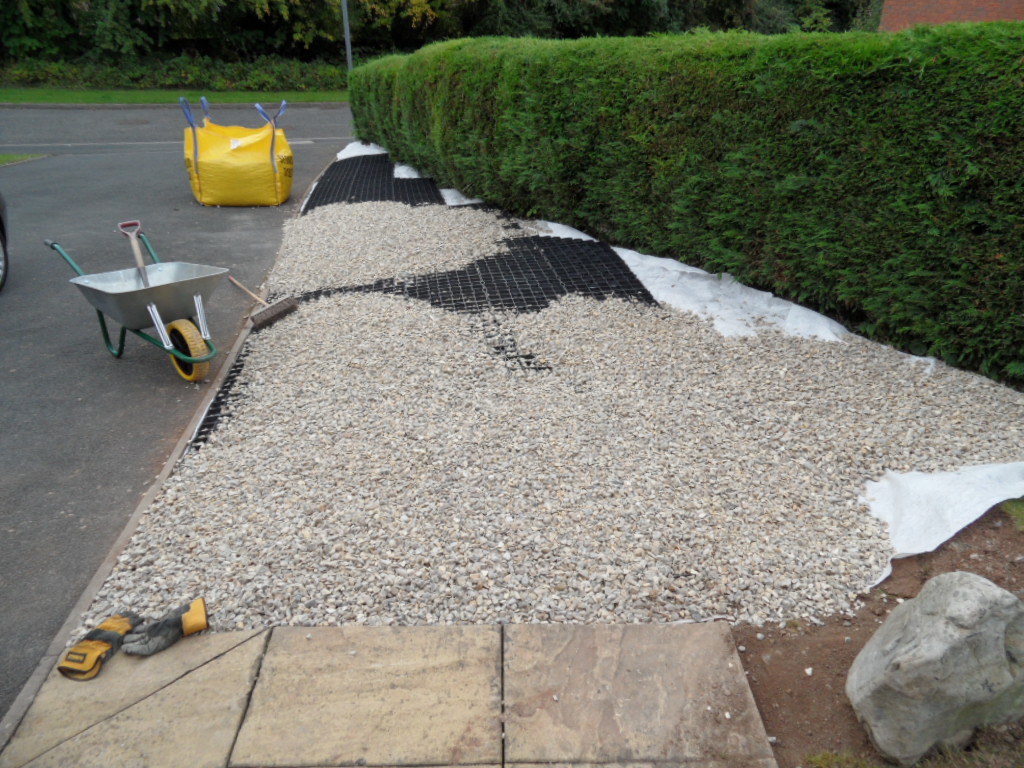
The gravel looks a little dull here but it is just the dust. When I wash it down it is a lot more golden. Once the bags were empty I discovered the coverage estimate they gave me was a little optimistic.


So another bag ordered for delivery today to finish off. This strip on the other side will not have grids as the tree has a lot of root under the grass which I don’t want to touch. It is however just a pathway when you park to prevent muddy feet in the winter. The spare grids I will use when I do the fence in the side garden to stand the sheds on.

Anyway the car fits and no more mud in the winter plus you get that nice gravel crunch when you walk on it. This is a little misleading as the mini has plenty of room behind it to get past the Z4.
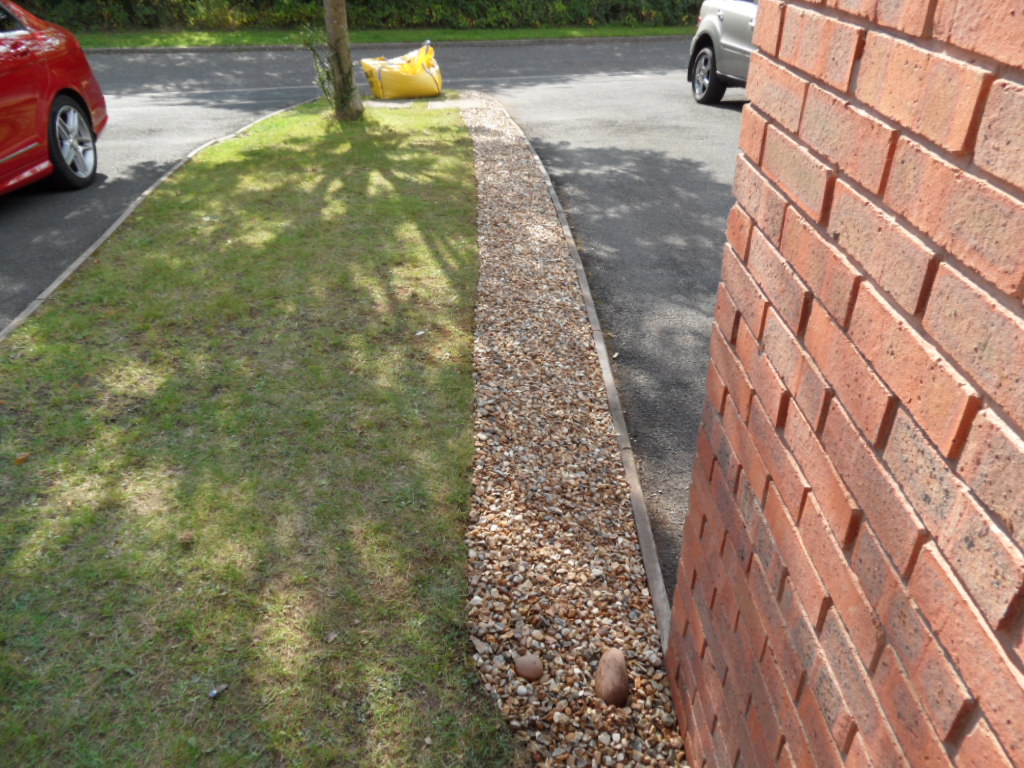

Extra bag arrives and the strip is complete.
I have a large drive but it is two cars wide and has a triangular wedge of grass on one side and grass on the other. When winter comes the edge of the grass gets very muddy so either the driver or the passenger has to walk through muddy grass to get in and out of the car,
The choices are
- Replace the drive and incorporate the wedge of ground into the new drive
- Get rid of the grass and create a surface for walking on
Well replacing the drive would be very expensive and also not be good for the hedge that runs down one side of the frontage as the water would not get into the ground. So the decision is to create a surface that will not get muddy and also will be able to have a car parked on it. I decided on gravel with a supporting plastic grid (recycled) to support the car and stop the gravel moving. This is doubly important as the wedge is not flat and falls away from the garage and also falls into the drive.
Chose these grids http://www.gridforce.co.uk/product/inovgreen-gf30.html

Each grid is 500mm x 500mm and four make up a square meter. They interlock together and are fairly flexible so can cope with the shape we need for the sloped patch of earth. There are rules about driveway extension and you do require planning permission for non permeable surface but of course the gravel is permeable.

this is what got delivered and the grids themselves are light. I was easily able to carry 4 square metres at a time. I also ordered a ground sheet to suppress weeds and also to stop the gravel from getting pressed into the soil below the grids, the fabric is a little rough which will help to keep everything in place.

I am fitting the grids here to see the shape of the ground and to identify uneven patches as just looking at dirt it is hard to see how level ad even you are. When I have done the whole lot I will take them up and lay the fabric and then place the grids ready for gravel.
You can see the fall towards the drive here and also the hedge which I want to keep healthy. I have dug it out by Mattock and Spade to preserve as much root structure as possible. You might notice the cable on the hedge this is the Virgin broadband and phone cable which was laid in this area and I had to get it out of the ground before I started digging. I will bury it along the hedge line once I am happy with the layout of the grids.
